The Options window is opened from the Settings > Tools menu and allows you to set several options that can be modified.
|
|
||||||||||||||||||||||||||||||||||||||||||||||||||||||||||||||||||||||||||||||||||
|
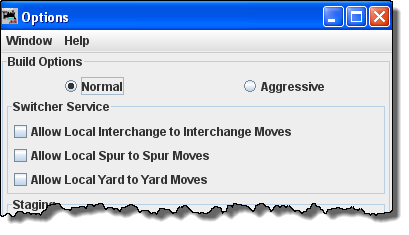
Normal
Aggressive Aggressive builds makes the car's track space available as soon as a car is scheduled for a pickup. Note that once you've built a train, the build option can not be changed until all trains are terminated or reset. |
||||||||||||||||||||||||||||||||||||||||||||||||||||||||||||||||||||||||||||||||||
| Switcher Service This set of options controls the local car movements. Normally, it is better not to allow a car to move from one spur directly to another spur in the same location. This type of move is very unrealistic.If you need these types of moves, select the appropriate checkbox. |
||||||||||||||||||||||||||||||||||||||||||||||||||||||||||||||||||||||||||||||||||
|
||||||||||||||||||||||||||||||||||||||||||||||||||||||||||||||||||||||||||||||||||
|
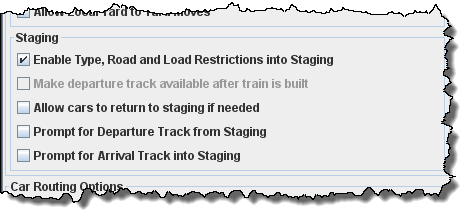
Staging
Enable Type, Road and Load Restrictions into Staging |
||||||||||||||||||||||||||||||||||||||||||||||||||||||||||||||||||||||||||||||||||
|
Make departure track
available after train is built (Greyed out in Normal mode) |
||||||||||||||||||||||||||||||||||||||||||||||||||||||||||||||||||||||||||||||||||
| Prompt
for Departure Track from Staging If you would like the program to ask you which track a train should depart from staging during the train build, select this option. Normally, during the train build the program would select the least recently used track when determining the track to depart from. Note that the program will only prompt you if there are two or more trains availabe in staging that meet the train's requirements. |
||||||||||||||||||||||||||||||||||||||||||||||||||||||||||||||||||||||||||||||||||
| Prompt
for Arrival Track from Stagiing If you would like the program to ask you which track a train should Arrive to staging during the train build, select this option. Normally, during the train build the program would select the least recently used track when determining the track to arrive on. Note that the program will only prompt you if there are two or more trains availabe in staging that meet the train's requirements. |
||||||||||||||||||||||||||||||||||||||||||||||||||||||||||||||||||||||||||||||||||
 |
||||||||||||||||||||||||||||||||||||||||||||||||||||||||||||||||||||||||||||||||||
|
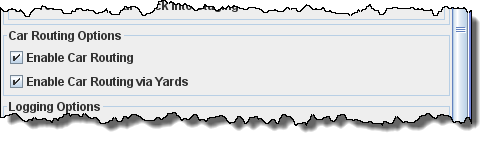
Car Routing Options
Enable Car Routing |
||||||||||||||||||||||||||||||||||||||||||||||||||||||||||||||||||||||||||||||||||
| Enable Car Routing via Yards Check if you want to allow car routing via your yards, then yards may be used if the most effiecient route. |
||||||||||||||||||||||||||||||||||||||||||||||||||||||||||||||||||||||||||||||||||
|
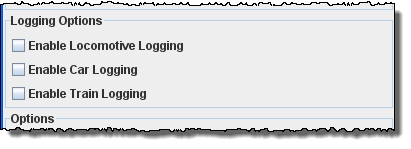
Logging Options If you want the operations program to log your locomotive, car, or train movements to file, select the appropriate checkboxes. The program will create a new directory called logger in the operations directory. For each day's session the program will create a new file(.csv) using the day's date. |
||||||||||||||||||||||||||||||||||||||||||||||||||||||||||||||||||||||||||||||||||
|
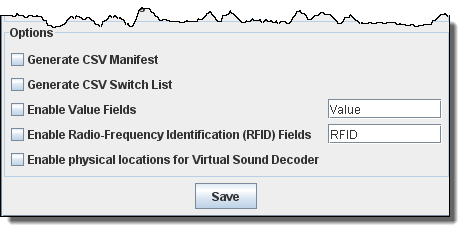
Enable Radio-Frequency Identification (RFID) Fields - This option allows the RFID to be renamed to anything you like and set the values that you want. Enable physical locations for Virtual Sound Decoder - |
||||||||||||||||||||||||||||||||||||||||||||||||||||||||||||||||||||||||||||||||||
|
||||||||||||||||||||||||||||||||||||||||||||||||||||||||||||||||||||||||||||||||||