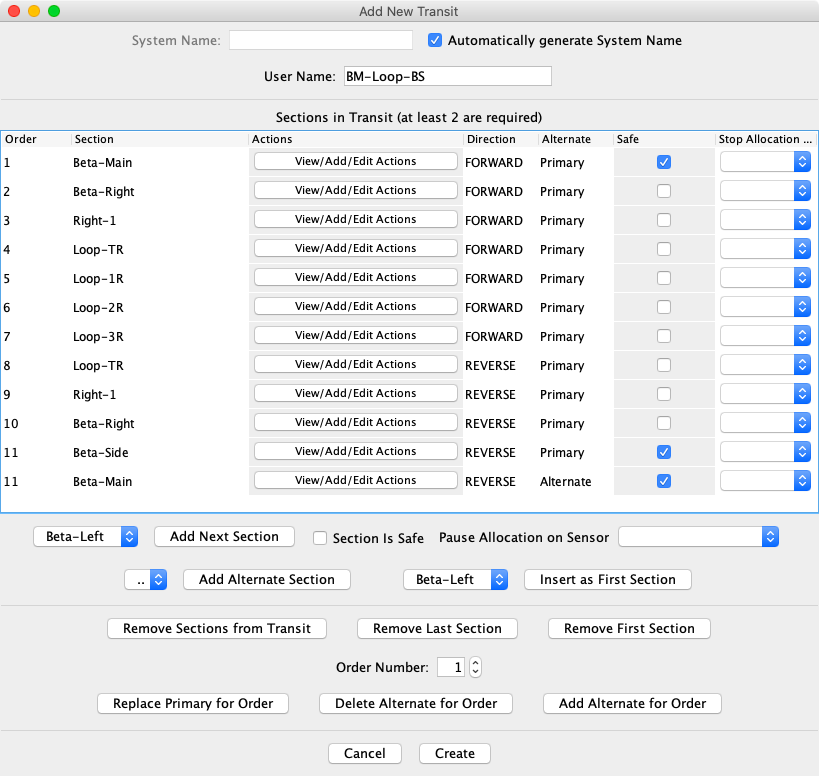
Click Transits in the Tables submenu of the Tools menu to bring up the Transit Table, and click the Add... button at the bottom of the table to bring up the Add/Edit Transit window.
Choose from:
Enter a User Name. Any string of characters that is different from the User Name of other Transits will be accepted, but it's wise to use a string that describes the intended use of the Transit.
Next add Sections to the Transit. Every Transit must have at least
two Sections, but most will have many more. Two "Primary" Sections are needed to define
the direction of the Transit.
Sections must be connected, and must be entered in
order. Select the Section you would like to begin the Transit in the upper popup menu. At
any point during Section addition, this popup menu lists only those Sections that are
eligible for addition.
If applicable, check Section is Safe to add the next Section with the
Safe checkbox selected.
Safe Sections allow auto-assigned Trains to safely halt during a Transit without blocking
a Transit for an opposing Train. For example:
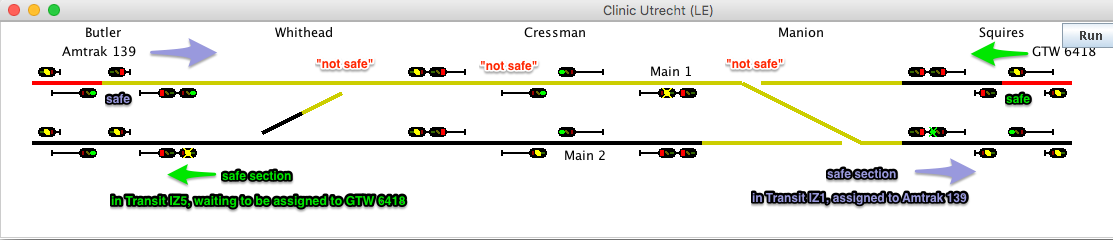
Once Train Amtrak 139 leaves the upper block of the interlocking at Manion, it reaches
the next Safe Section.
You would set up The transit for this Train as follows:
(for more on Safe see the Activate
New Train Help)
Click Add Next Section to add the first Section of the Transit.
The Pause Allocation on Sensor option can be used to assign a sensor that when Active will stop allocating sections. This can also be set later by changing the appropriate row in the section list.
Add more primary Sections in the same manner. Select the Section to be added in the popup menu, and click Add Next Section.
Immediately after entering a Section using Add Next Section, if you
would like to add an Alternate Section to the one just entered, select
an alternate Section from the popup menu to the left of the Add Alternate
Section button. If there are no possibly valid Alternate Sections, the popup
menu will be empty. Often the popup menu will contain possible Alternate Sections that
are not really alternates to the primary Section. For a listed alternate Section to be a
valid Alternate Section, it must connect to the next primary Section.
It is your responsibility to determine whether a Section listed in the popup menu
is a valid alternate Section, i.e. will connect to the next primary Section.
For more information on alternate Sections and their use, refer to the Transit Documentation.
If you decide you need to add a Section at the beginning of the Transit, select a Section in the popup menu to the left of the Insert As First Section button, then press the Insert As First Section button. The selected Section will become the first Section in the Transit, with order number "1", and the order numbers of all other Sections will be incremented. The popup menu will be empty if there are no possible Sections to add at the beginning of the Transit.
The next set of buttons provide options to aid in setting up or editing a Transit.
If at any time you decide you want to start over, click Remove Sections from Transit to clear the table of Sections, and return to step 4 above.
The Remove Last Section and Remove First Section buttons delete a Section at the end or beginning of the Transit, and adjust order numbers of the remaining Sections. Primary Sections in the middle of the Transit may not be deleted because doing so would break the connectivity of Sections within the Transit.
The remaining three editing buttons provide for replacing a primary Section and deleting or adding an alternate Section in the middle of the Transit. To use these buttons, in the center of the pane set the order number of the Section to be edited, then press one of the buttons -- Replace Primary for Order, Delete Alternate For Order, or Add Alternate For Order. If no Sections are available that meet the requirements, a message will appear, and no changes will be made. If only one Section satisfies the requirements, the edit is immediately performed. If more than one Section satisfies the requirements, a dialog is presented so a choice of Section may be made. When a primary Section is replaced, its Actions (see below) are preserved.
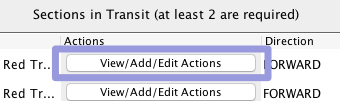
If you will be using this Transit to run an automatic Train, click the View/Add/Edit Actions button to set up any Action needed when a train is in the specified Section.
You can add Actions now, or you can edit this Transit at a later time to set up Actions. More information is provided in the View Actions help. It is usually better to set up all Sections before adding Actions, because when a Section is deleted from the Transit, its Actions are also deleted.
Click the Create button at the bottom of the window. If everything is fine, the window will close and a new Transit will appear in the Transit Table. If there is trouble with anything, a message will be displayed indicating the error and what you should do to fix it. Correct the error and click Create again.
Note: The Direction and Alternate columns in the Add/Edit Transit Table are for information only. They are set automatically as you build the Transit. The Direction column indicates the direction of travel through the Section, and the Alternate column indicates whether the Section is the Primary Section for this order number or an Alternate Section.
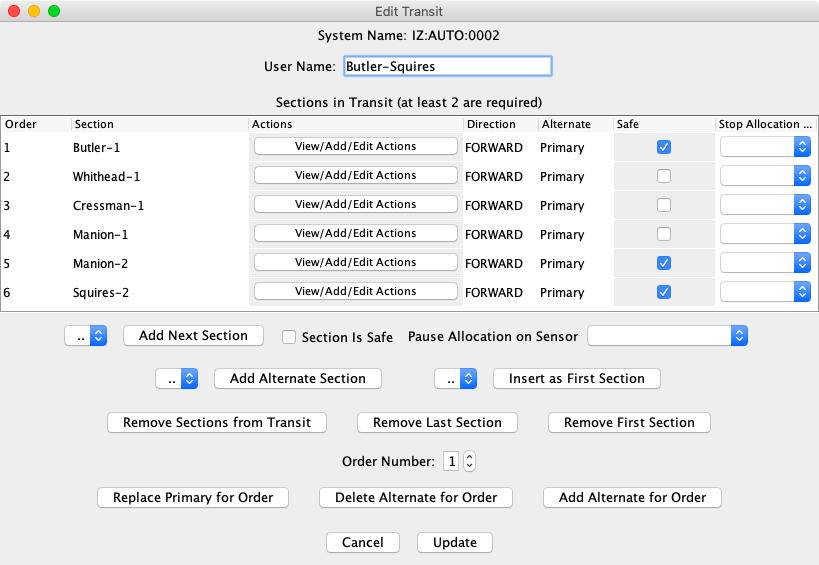
Click a Transit's Edit button in the Transit Table to bring up the Add/Edit Transit window. The window will be the same as that shown above, except the System Name will be fixed, and the Create button will be replaced with an Update Button.
Make whatever changes or additions you need to the information in the window. Note that the System Name of the edited Transit may not be changed, but the User Name may be changed. Items that may be edited are described above in steps 3 through 9 in the procedure for adding a new Transit.
After making changes to the Transit information, click Update to change the selected Transit. If everything is fine, the window will close. If there is any trouble, a message will be displayed indicating the error and what you should do to fix it. Correct the error and click Update again.
Back to the Transit Table help page.